
Chocolate that looks dull and streaky after melting is a common complaint among home bakers, and it usually has nothing to do with the chocolate being bad. The cause is how the fat inside it re-formed as it cooled. That is why tempering chocolate matters: it controls how the cocoa butter sets, and the setting decides how the finished piece looks, sounds and feels.
Tempering has a reputation as a professional skill that needs marble slabs and special equipment. The idea behind it is simple, though, and once you understand it you can decide whether a given project needs tempering at all. Many don’t.
What goes wrong when you just melt chocolate and let it set
Melt a good bar, spread it on parchment, and leave it on the counter. If you skip tempering, you will often see one or more of these:
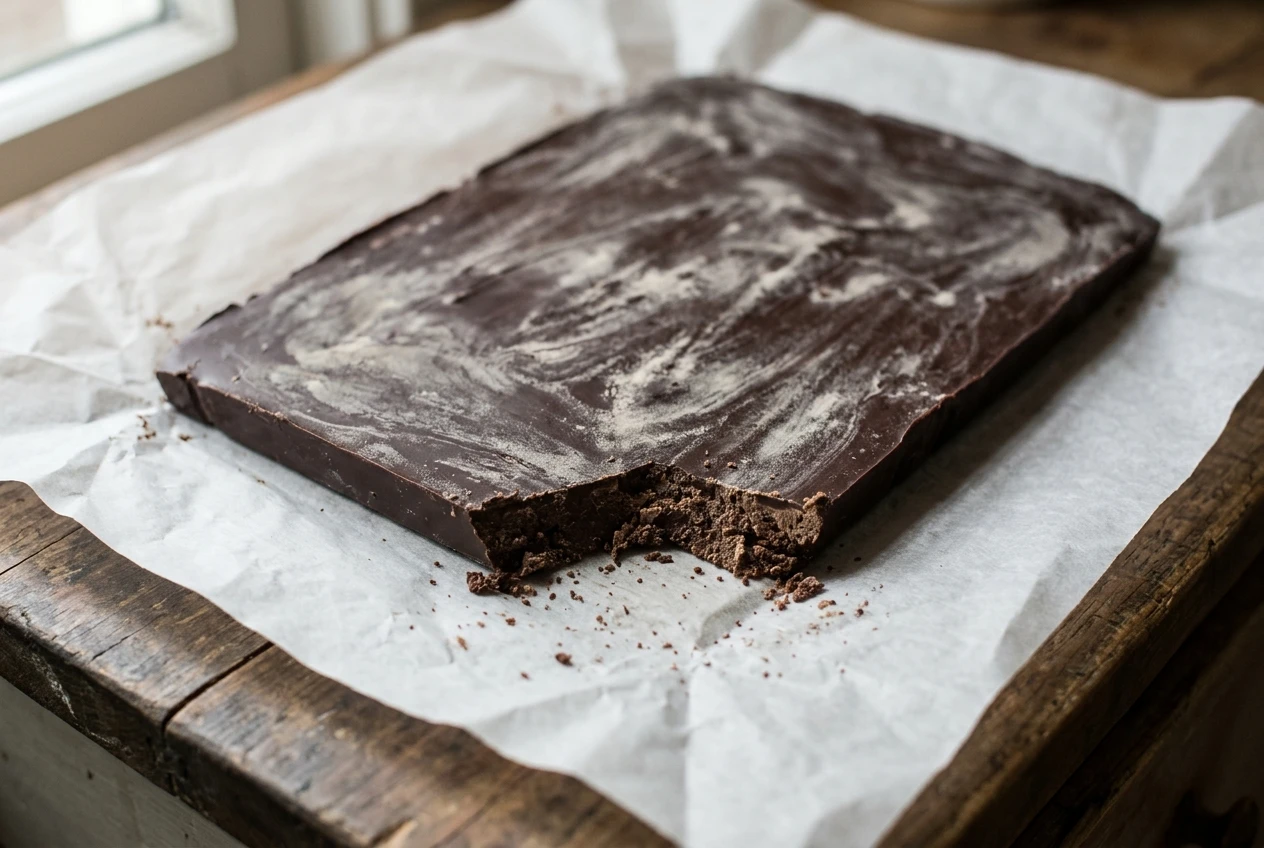
- A dull, matte surface instead of a glossy one.
- Grey or white streaks and swirls running across the top.
- A soft texture that bends or crumbles instead of breaking with a clean snap.
- Chocolate that smears on your fingers almost as soon as you pick it up.
- Sticking in the mold, so pieces break when you try to release them.
The white or grey marks are called fat bloom. Cocoa butter that set in an unstable form has migrated to the surface and crystallized there as a pale film. Bloom is safe to eat and the chocolate tastes much the same, but it looks unappealing and feels slightly greasy or chalky.
Sugar bloom looks similar and has a different cause. Moisture touches the surface, dissolves some sugar, and leaves gritty crystals behind when it dries. Fat bloom feels smooth and waxy, while sugar bloom feels rough. Seized chocolate, which turns into a thick, grainy paste, is a third problem. It happens when a little water gets into melted chocolate, and tempering does not fix it.
What tempering actually does inside the chocolate
Chocolate gets its structure from cocoa butter, the natural fat in cacao. Cocoa butter is unusual because it can solidify into several different crystal arrangements, often described as six forms. The forms differ in how tightly the fat molecules pack together and at what temperature they melt.
Only one of those forms gives you the glossy, snappy chocolate you buy in a good bar. It is usually called Form V. The others are less stable and tend to produce soft, dull or bloomed results.
When you melt chocolate completely, every crystal dissolves. If you then leave it to cool without guidance, the cocoa butter sets into a random mix of forms, and that mix gives you the streaks and the soft texture.
Tempering steers the process in three stages:
- Melt the chocolate fully so that all existing crystals disappear.
- Cool it while stirring, so that crystals begin to form.
- Rewarm it slightly, which melts the unstable crystals and leaves the stable Form V ones behind.
Those remaining stable crystals act as seeds. As the chocolate sets, the rest of the cocoa butter organizes itself around them in the same tight arrangement. Constant stirring spreads the seeds evenly, so the whole batch sets uniformly.
Why cocoa butter crystals decide shine, snap and melt
Each quality people love in a bar comes from the same crystal structure.
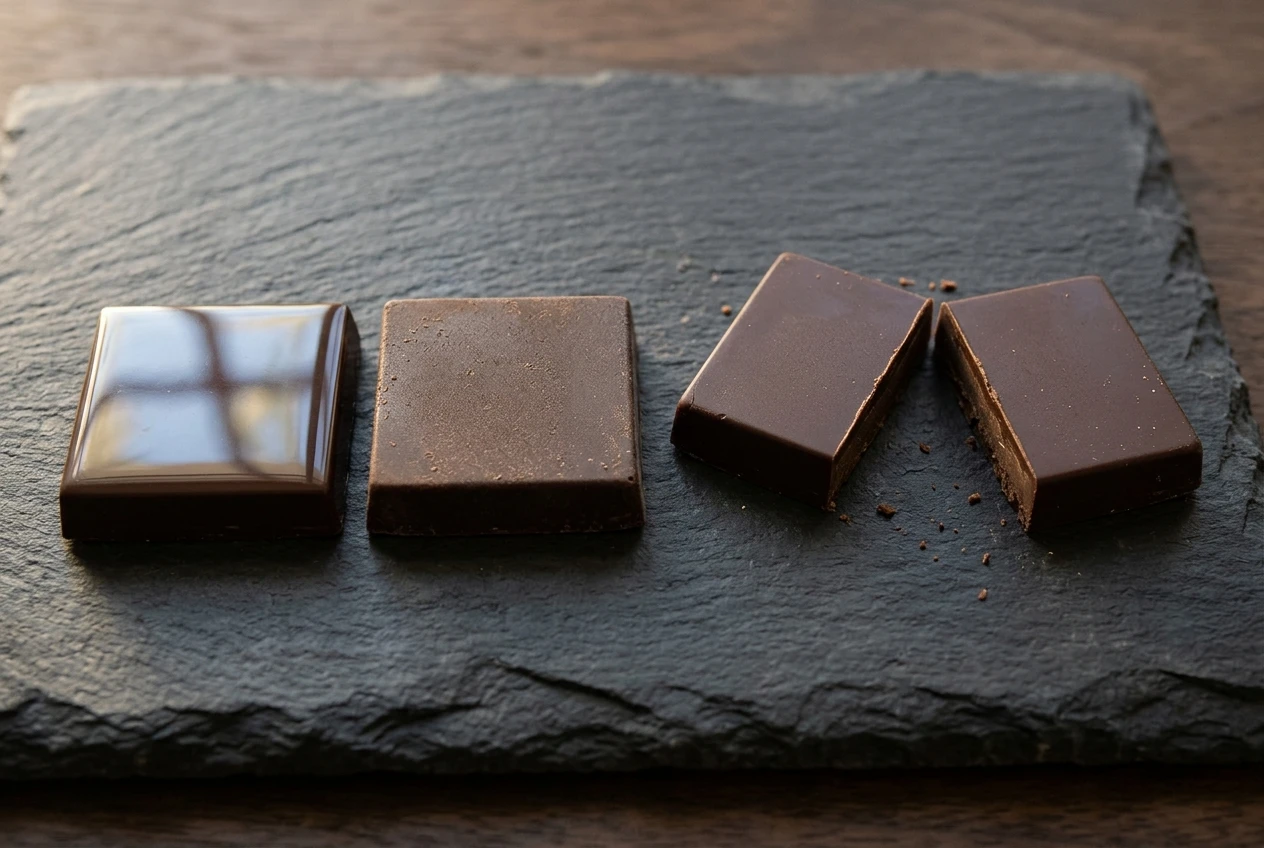
Shine. In well-tempered chocolate, tiny crystals pack together densely and the surface sets flat and smooth. A flat surface reflects light evenly, which looks glossy. Untempered chocolate sets with a rougher, uneven surface that scatters light, so it looks dull.
Snap. A tight, uniform crystal network breaks along clean lines. That is the sharp crack you hear when you break a square. A mix of crystal forms gives a weaker structure that bends, crumbles or breaks raggedly.
Melt. Form V cocoa butter melts at roughly 34°C (about 93°F), just below body temperature. A piece stays firm and dry in your hand at room temperature and then melts smoothly in your mouth. Unstable forms melt at lower temperatures, so untempered chocolate gets soft and sticky from the warmth of your fingers.
Tempered chocolate also contracts slightly as it sets, which helps it release cleanly from molds. It stays stable longer in storage too, because the structure is less likely to rearrange itself and push fat to the surface as bloom.
If you want to understand how flavor and texture connect, the same attention to snap, melt and aroma is covered in How to Taste Chocolate Like a Pro: A Beginner’s Sensory Guide. Tempering affects how a piece breaks and melts, and both change how it tastes.
Bakes where tempering matters and bakes where you can skip it
Tempering only helps when the chocolate sets by itself and is seen, touched or stored at room temperature. When chocolate is mixed into something else, its crystal structure stops mattering.
Tempering is worth doing for:
- Dipped strawberries, pretzels, cookies or nuts, where the chocolate is the outer coating
- Molded chocolates and homemade bars
- Truffle shells and filled chocolates
- Decorations such as curls, shards, and piped or molded shapes
- Gifts that will be handled and stored for several days
You can skip it for:
- Brownies, cakes and cookie dough, where melted chocolate is stirred into batter
- Ganache, which is chocolate blended with cream and sets by a different mechanism
- Frosting, fudge sauce and hot chocolate
- Fillings and layers that stay hidden inside a bake
- Anything you plan to keep in the refrigerator and eat soon
A sensible rule is to ask whether anyone will see or snap the chocolate by itself. If so, temper it. If the chocolate will be baked, blended, or covered by something else, plain melting works fine.
Three beginner-friendly ways to temper at home
All three methods below follow the same melt, cool and rewarm logic. They differ in effort, equipment and how forgiving they are.
Method What you need Effort Best for Seeding on a double boiler Heatproof bowl, pan of barely simmering water, digital thermometer, extra chopped chocolate Medium Learning how the stages feel Seeding in the microwave Microwave-safe bowl, digital thermometer, extra chopped chocolate Low Small batches, quick dipping Countertop tempering machine A dedicated tempering machine Very low Frequent use and larger batches
Seeding on a double boiler
Melt about two thirds of your chopped chocolate gently over barely simmering water, keeping the bowl clear of the water and keeping steam and drops away from the chocolate. Take it off the heat and stir in the remaining third, which is chocolate that is already in temper. The unmelted pieces supply the stable crystals and cool the mixture at the same time. Stir until the temperature drops into the working range and the pieces have melted.
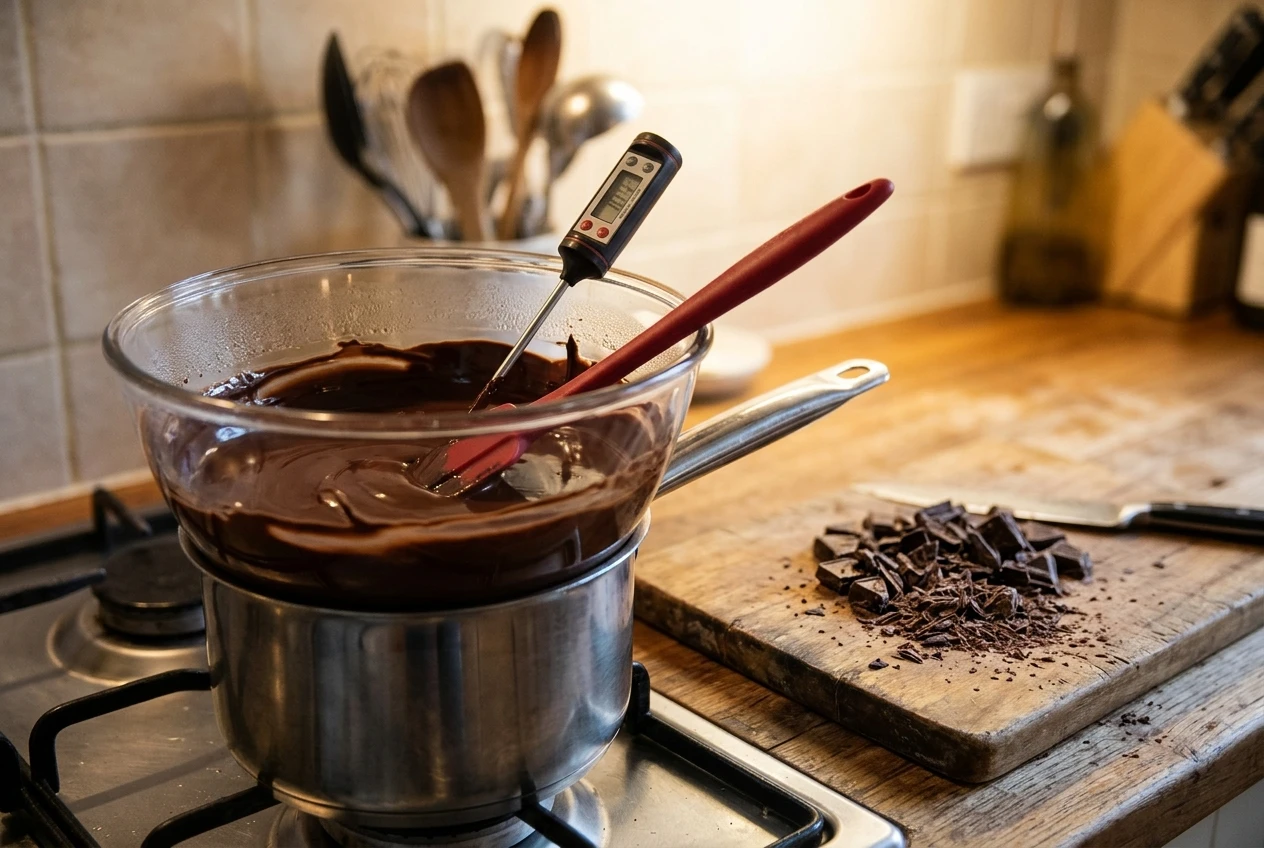
This method teaches you the most, because you can watch the temperature fall and see the chocolate thicken slightly. The risk is steam or water getting into the bowl, which can cause seizing.
Seeding in the microwave
Heat chopped chocolate in short bursts of about 20 to 30 seconds, stirring thoroughly each time, until most of it has melted. Stop while a few small lumps remain and stir until they dissolve. For a larger batch, add some extra chopped chocolate as seed.
This is the lowest-effort route, and it suits small amounts. The main danger is overheating, because microwaves heat unevenly. If the chocolate goes past the melting range, the crystals you need are destroyed and you have to start the seeding step over.
A countertop tempering machine
These machines hold chocolate at a controlled temperature and do the cooling and rewarming for you. They are convenient if you expect to make chocolates often. They are also the one option on this list that costs real money, so wait until you know you’ll use one.
For most beginners, a digital thermometer is the only purchase worth making first. Everything else is a nicety until you’ve tempered by hand a few times.
How to tell your chocolate is in temper before you commit
You do not have to pour a full batch to find out. A quick test saves chocolate and frustration.
The temperature check. Target temperatures vary by type and by maker, so follow the package if it gives them. As a rough guide:
- Dark chocolate: melt to about 45 to 50°C (113 to 122°F), cool to about 27 to 28°C (81 to 82°F), then rewarm to about 31 to 32°C (88 to 90°F).
- Milk chocolate: melt to about 40 to 45°C, cool to about 26 to 27°C, and work at about 29 to 30°C.
- White chocolate: melt to about 40 to 45°C, cool to about 25 to 26°C, and work at about 28 to 29°C.
The smear test. Dip the tip of a knife or a strip of parchment into the chocolate and leave it at normal room temperature, around 20°C or a bit cooler. Well-tempered chocolate begins to set within a few minutes, often about five, and dries glossy and even. If it stays wet and tacky, or dries with streaks, the chocolate is not in temper yet.
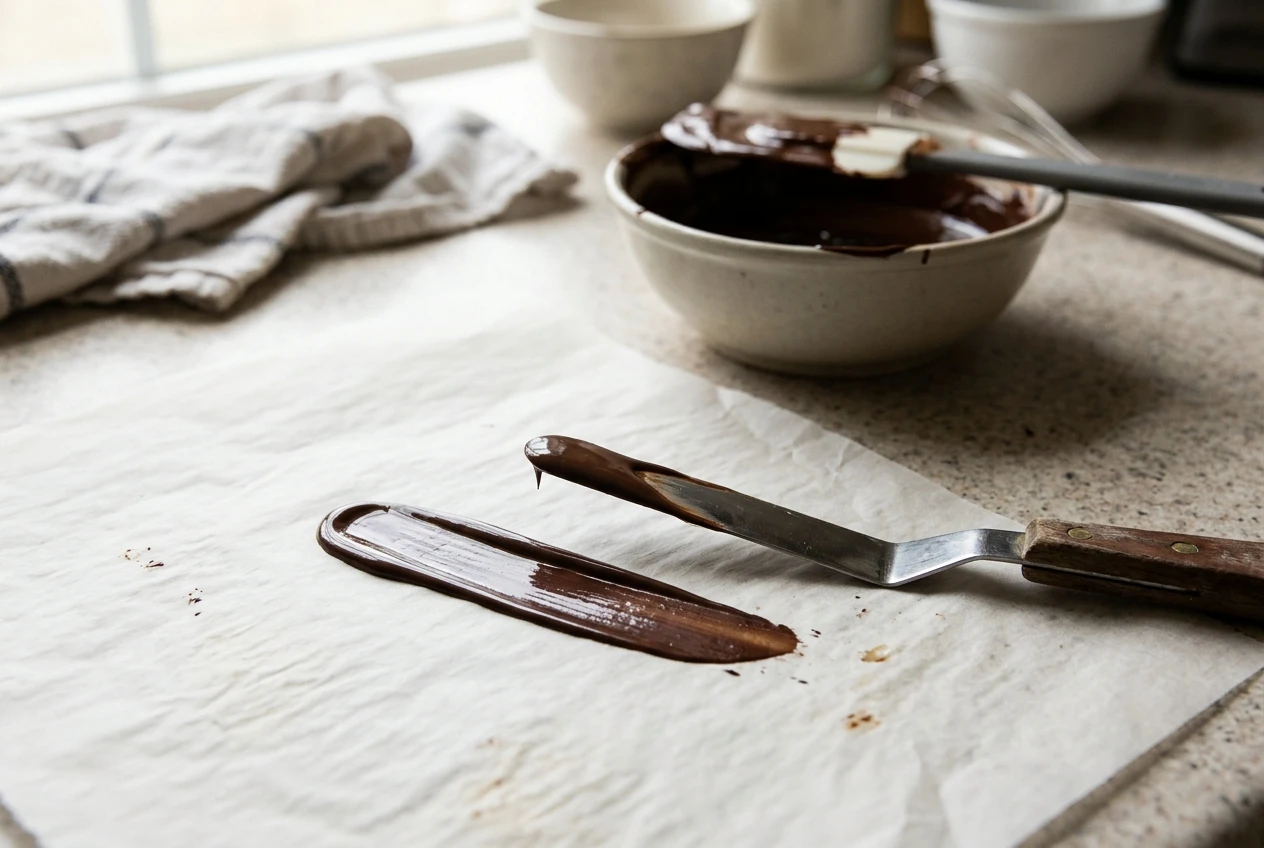
The feel while stirring. In temper, chocolate thickens slightly and holds a soft sheen on the spatula. If it gets too thick to work, it has probably cooled too far. Warm it very gently by a degree or two.
Why the type of chocolate you start with changes your odds
Tempering only works with real chocolate that gets its fat from cocoa butter. Bars and callets (small discs made for melting) that list cocoa butter in the ingredients are the best candidates.
Products labeled as compound coating, candy melts or “melting wafers” often replace cocoa butter with other vegetable fats. They set glossy without tempering, which makes them handy for decorating. They won’t give you the same snap or melt-in-the-mouth finish, and the flavor is different.
Chocolate type matters as well. Dark chocolate is the most straightforward, since it contains little besides cacao and sugar. Milk and white chocolate contain milk fat, which interferes with cocoa butter crystallization, so they need lower temperatures and are less forgiving. A beginner is often better off practicing with dark chocolate first.
Percentage also plays a part. A higher cacao percentage means more cocoa solids and often more cocoa butter, which affects how the chocolate flows. What Does 70% Cacao Actually Mean? covers what that number tells you, though it is not a guarantee of how a particular bar will temper.
Choose a bar from a single, reputable maker, check that the ingredient list is short, and avoid bars with added vegetable oils if you plan to temper. Chocolate that has already been through bloom, or has been stored somewhere warm and then cooled again, may also behave less predictably.
Choose the bar first, then decide on tempering
If your finished chocolate will be seen and handled, tempering is worth learning, and a digital thermometer and a decent dark bar are enough to start. If you are baking brownies or stirring chocolate into a batter, melt it and carry on.
Before you pick up a thermometer, it helps to know what is in the bar you are about to melt. Read the related guide on the main types of chocolate to choose the right bar before you try tempering.